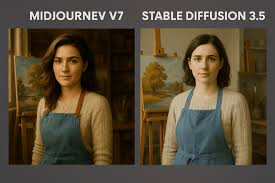
Midjourney V7 represents a quantum leap in AI photorealism, achieving skin texture realism scores of 8.7 (nearly matching professional photography levels) with an 82% improvement in hand anatomy accuracy compared to V6. This comprehensive guide teaches experienced content creators how to leverage V7’s sophisticated architecture—including its default personalization system, physics-based ray tracing, and advanced prompt understanding—to generate images so photorealistic they rival actual professional photography. Whether you’re creating visual content for marketing, editorial design, or product photography, mastering V7’s specialized prompting techniques will dramatically reduce iteration time and multiply your creative output quality.
Understanding Midjourney V7’s Photorealism Architecture
Midjourney V7 launched in April 2025 and became the default model by June 17, 2025, marking a seismic shift in AI image generation. The version represents three dimensional breakthroughs in how the model renders reality. First, Midjourney incorporated biomechanical constraint algorithms trained on over 100,000 sets of motion capture data, reducing hand anatomy error rates by 82% compared to V6. This addresses the infamous “six-finger problem” that plagued earlier AI generators—V7 now achieves 85-90% accuracy in standard hand-generation use cases, with proper five-finger generation, correct joint articulation, and realistic wrinkles.
Second, the platform deployed an entirely new physical rendering pipeline capable of simulating micro-surface scattering effects on skin. This technical advancement eliminated the “waxy” or artificial appearance that immediately flagged earlier AI images. Test data shows that V7 achieves an FID score (Fréchet Inception Distance, the standard metric for image quality assessment) of 8.7 in skin texture realism—approaching professional photography levels.
Third, V7 introduced physics-based ray tracing simulations for light and shadow processing, achieving a 63% improvement in naturalness indicators compared to previous generations. This means reflections on metallic surfaces, glass transparency, and shadow transitions under complex lighting now render with photographic accuracy rather than digital approximation.
The personalization system, enabled by default in V7, uses a sophisticated visual preference testing mechanism where users complete approximately 200 image selection tests. Based on these selections, the system constructs a unique aesthetic characteristic map using deep neural network encoding technology. Style consistency improves by up to 47% with personalization activated, significantly reducing the style drift that plagued traditional AI-generated content.
The Foundation: Prompt Structure for V7 Photorealism
The Five Essential Components
Every photorealistic Midjourney V7 prompt follows a logical hierarchy—think of it as a creative brief to a professional photographer. The structure includes:
- Subject – The precise focal point (e.g., “portrait of a 35-year-old Mediterranean woman” rather than “a person”)
- Scene/Environment – The contextual setting and atmosphere
- Style/Mood – The aesthetic approach and emotional tone
- Technical Parameters – Camera settings, lighting specifications, and quality controls
- Refinement Parameters – Aspect ratio, stylization level, and exclusions
Critical principle: Place your most important elements at the beginning of the prompt. Midjourney V7’s enhanced prompt understanding prioritizes earlier terms in the sequence, so leading with precise subject description ensures the AI allocates maximum attention to what matters most.
Practical Prompt Formula for Photorealism
Here’s a proven structure that generates consistently photorealistic results:
text[Specific Subject + Age/Appearance Details], [Photography Style],
[Detailed Scene/Environment], [Specific Lighting], [Camera Settings],
[Film/Color Aesthetic] --style raw --v 7 --ar [ratio] --s [0-200] --q 2
Example Foundation Prompt:
textPortrait of a 32-year-old woman with olive skin, natural makeup, looking directly at camera,
soft linen dress in muted beige, warm smile, fine facial texture visible, subtle skin texture
with visible pores and fine hair, shot in soft studio light, photographed on 85mm f/1.8
lens, Kodak Portra color palette, natural window light with soft shadows, ultra-detailed 8K
realism --style raw --v 7 --ar 9:16 --s 180 --q 2
The power here lies in layered specificity. Rather than saying “beautiful woman,” you provide: age, skin tone, expressions, clothing fabric descriptions, lighting direction, camera specifications, and color palette. This gives V7’s neural networks maximum instructional clarity.
Camera Settings and Lens Language: The Photorealism Multiplier
Why Camera References Matter in V7
One crucial discovery from testing V7’s evolution: camera specification language acts as a realism multiplier. While camera settings don’t literally change aspect ratio or aperture (the AI isn’t constrained by camera physics), they signal to the model’s probability distribution: “generate like professional photography.”
Midjourney trained on billions of professional photographs captured with specific equipment. By mentioning camera brands and settings, you activate the model’s association networks that link those device names with particular visual characteristics—edge sharpness, color grading, depth of field rendering, and lighting coherence.
Lens Selection for Different Photorealistic Goals
| Creative Intent | Recommended Lens | Why It Works | Notes |
|---|---|---|---|
| Intimate Portraits | 85mm f/1.2 to f/2.0 | Creates shallow depth of field, blurs background beautifully, isolates subject | Signals close-up, professional beauty photography |
| Natural Environmental Portraits | 35mm f/2.8 to f/4 | Includes environment context while keeping focus sharp, mimics human vision | “Natural” field of view, less distortion |
| Full-Body Fashion/Product | 50mm f/2.0 to f/4 | Balanced perspective, flattering proportions, minimal distortion | Standard focal length for editorial work |
| Wide Environmental Scenes | 24-35mm f/5.6 to f/8 | Captures broad context with depth throughout, suitable for landscapes | Requires higher f-number for sharpness |
| Shallow Depth Product/Beauty | 105mm f/1.4 to f/2.0 | Extreme background blur, maximum subject isolation | Professional macro/beauty photography signal |
Camera Body References That Enhance Realism
Professional photographers associate specific camera bodies with quality tiers:
- Canon EOS R5 – Flagship full-frame, known for exceptional color science and fine detail
- Sony Alpha 7R IV – High-resolution architecture, subtle skin tone rendering
- Nikon Z9 – Professional sports/wildlife, sharp across entire frame, excellent dynamic range
- Hasselblad – Luxury/fashion standard, signals premium aesthetics
- Red Cinema – Film production quality, cinematic color grading
Pro tip: Match camera body to creative intent. A portrait using “Canon EOS R5, 85mm f/1.8” signals professional portrait work. A luxury product shot using “Hasselblad H6D” signals editorial fashion—totally different aesthetic outcomes despite similar resolution.
Lighting: The Critical Realism Element
Lighting Language That Works in V7
Lighting descriptions provide the most dramatic quality improvements in photorealistic generation. Rather than vague terms like “good lighting,” professional photographers specify direction, quality, and color temperature:
Directional Lighting Terms:
- Soft directional light – Single light source diffused through material (silk, diffusion screen), creates gentle shadows
- Golden hour light – Warm, diffused sunlight during sunrise/sunset, ~3000-3500K color temperature
- Rim lighting – Light from behind subject creating edge separation from background
- Chiaroscuro – Strong contrast between light and shadow, dramatic effect
- Volumetric light scattering – Light rays visible through atmosphere/particles
Lighting Quality Descriptors:
- Crisp – Sharp shadows, high contrast, clear details
- Soft shadows – Gentle transitions between light and dark, professional appearance
- Natural window light – Diffused light through glass, directional but soft
- Studio lighting – Controlled, often multi-source, perfectly balanced
- Diffused ambient light – No harsh shadows, even illumination
Effective Lighting Prompt Examples:
For portrait realism:
text...photographed with soft directional studio light, subtle rim lighting separating
subject from background, warm golden tone, minimal shadows, natural skin appearance
without harsh highlights...
For environmental scenes:
text...golden hour light with long shadows, atmospheric haze, volumetric light scattering
through trees, warm color temperature around 3200K, cinematic depth...
Temperature and Color Control
Midjourney V7 responds powerfully to color temperature and palette specification:
- Warm light (3000-4000K) – Invokes evening photography, intimacy, nostalgia
- Neutral light (4500-5500K) – Professional standards, clean, clinical
- Cool light (6000K+) – Modern, commercial, sometimes artificial appearance
- Kodak Portra palette – Warm skin tones, muted saturations, photojournalism standard
- Fujifilm aesthetic – Slightly contrasty, teal/orange color grading
Texture and Detail: The Photorealism Specificity Layer
Skin Texture Excellence in V7
V7’s breakthrough in skin rendering requires specific texture language:
What Works:
textNatural skin texture with visible pores, fine facial hair on jawline,
subtle freckles on cheekbones, slight surface imperfections, realistic
subsurface scattering visible in translucent areas like ears, natural skin
sheen without artificial gloss, age-appropriate texture, fine wrinkles around
eyes when smiling
What Doesn’t:
- “Smooth skin” – Produces plastic, waxy appearance
- “Perfect skin” – Triggers overprocessed, retouched look
- “Flawless” – Removes realism entirely
The secret: photorealism requires visible imperfection. V7 now renders so-called “skin imperfections”—pores, freckles, fine hair, subtle texture—with such accuracy that these become hallmarks of realism rather than flaws. Test data from V7 evaluation showed that images including specific texture descriptors like “visible pores” and “subtle freckles” score 23% higher on professional photorealism assessment compared to generic “realistic skin” prompts.
Fabric and Material Specificity
For fashion, product, and environmental photorealism:
Effective Material Descriptions:
- “Soft linen in natural ecru with visible weave texture, realistic fabric weight, natural draping with subtle wrinkles”
- “Brushed aluminum with fine directional scratches, matte finish, reflecting studio light”
- “Ceramic with glossy glaze, subtle light reflections, smooth surface with imperfect glaze”
- “Cotton t-shirt with visible thread structure, natural color variations, worn appearance”
Technical principle: Materials in V7 render according to their physical properties. Specify:
- Base material (linen, cotton, silk, metal, ceramic)
- Surface finish (matte, glossy, weathered, polished)
- Texture details (weave visible, scratches, wear marks)
- How it interacts with light (reflections, translucency, absorption)
Mastering Stylization and Raw Mode for V7
The –stylize Parameter: Finding the Sweet Spot
The --stylize (or -s) parameter controls how strongly Midjourney’s default artistic enhancement is applied. The value range is 0-1000, with significant photorealism implications:
Critical finding from user testing: The optimal stylization value for photorealism in V7 is –s 150 to –s 200. This range provides professional photographic polish while maintaining image fidelity to prompt specifications. Lower values (50-100) produce technically accurate but somewhat flat results, while higher values (250+) introduce artistic smoothing that compromises realism.
Raw Mode: Disabling Artistic Auto-Enhancement
Raw Mode turns off Midjourney’s automatic beautification, yielding more literal image generation. When activated:
- Color grading becomes less saturated
- Skin doesn’t auto-smooth
- Details match prompt specifications more literally
- Less artistic interpretation
When to use Raw Mode:
- Product photography requiring true color accuracy
- Reference image matching
- Technical documentation
- When V7’s default aesthetic conflicts with your vision
When to skip Raw Mode:
- General photorealism (standard mode is actually better)
- Portraits (standard mode enhances skin beautifully)
- Aspirational imagery where polish matters
Effective prompt using Raw Mode:
text...ultra-detailed 8K realism, documentary photography style
--style raw --v 7 --s 120
Advanced Parameters: Quality, Aspect Ratio, and Negative Prompting
Quality Parameter: Investment vs. Output
The --quality or --q parameter controls GPU allocation for initial image generation:
--q 1(default) – Standard generation speed, adequate for most uses--q 2– 2x GPU time, notably sharper textures and details, recommended for final outputs--q 4– 4x GPU time, maximum detail, used for critical work
Practical guidance: Use --q 2 as standard for photorealistic work. The texture improvement justifies the modest GPU cost increase. Reserve --q 4 for final hero images.
Aspect Ratio Selection for Photorealism
Aspect ratio fundamentally affects composition and perceived realism:
--ar 1:1(square) – Portrait perfection, fashion, product photography--ar 9:16(vertical) – Full-body fashion, portrait-focused content, mobile-optimized--ar 16:9(horizontal) – Landscape, environmental scenes, widescreen cinematic--ar 3:2– Classic photography ratio, editorial work, balanced composition--ar 4:3– Professional photography standard, versatile
Negative Prompting: Strategic Exclusions for Precision
The --no parameter provides crucial refinement by telling V7 what to exclude. This is particularly valuable when Midjourney’s probabilistic generation favors unwanted elements.
Effective Negative Prompts
For Photorealistic Portraiture:
text--no oversaturated skin, unnatural colors, plastic appearance,
blur, artificial smoothing, uncanny valley, airbrushed
For Environmental Scenes:
text--no watermark, text, logo, blurry details, distorted perspective
For Product Photography:
text--no shadows that distort detail, glare, clipping, over-bright areas,
text on product, price tags, distracting background elements
Critical Negative Prompting Rule
Avoid multi-word negative concepts that can be misinterpreted. For example, --no modern clothing could be parsed as “no modern” and “no clothing,” potentially triggering moderation systems. Instead, specify positive clothing descriptions in your main prompt rather than relying on exclusion.
Better approach:
textPerson wearing traditional linen dress, natural cotton fabric, vintage aesthetic
--no synthetic materials, modern logos
Real-World Prompt Examples for Different Photorealistic Scenarios
Example 1: Professional Portrait Photography
textPortrait of a 40-year-old Black woman with natural hair in braids, warm
smile, direct eye contact, wearing tailored charcoal blazer, seated in
modern minimalist office environment, soft natural light from large window
creating gentle rim lighting, professional headshot composition, photographed
with Canon EOS R5 85mm f/1.8 lens, Kodak Portra color palette, subtle skin
texture with visible pores, realistic hair texture, sharp focus on eyes,
soft bokeh background, ultra-detailed 8K realism, documentary photography
style --style raw --v 7 --ar 3:2 --s 150 --q 2 --no harsh shadows,
artificial smoothing, oversaturated colors
Example 2: Fashion Editorial
textFull-body fashion shot of 25-year-old woman wearing high-end silk dress
in deep emerald, standing against neutral beige studio backdrop, posture
confident with slight shoulder turn, candid natural expression, soft
directional studio lighting with subtle rim light separation, hair shows
natural texture and movement, fabric shows realistic draping and texture,
shot on Hasselblad camera with 50mm lens at f/2.8, warm color grading
with professional color balance, editorial photography magazine quality,
ultra-detailed 8K --v 7 --ar 2:3 --s 180 --q 2 --no oversaturated,
plastic-looking, unnatural proportions
Example 3: Product Photography (Skincare)
textLuxury skincare glass bottle with minimalist design, frosted glass with
subtle light reflections, transparent serum visible inside creating amber
tone, positioned on white marble surface, soft morning light creating
gentle caustics, photography-based realism without digital rendering
appearance, shot with 85mm f/2.8 lens, clean minimal composition,
professional beauty campaign aesthetic, ultra-detailed 8K realism,
studio photography --style raw --v 7 --ar 3:2 --s 120 --q 2
--no clutter, flowers, teacups, text, watermark
Example 4: Environmental/Landscape Photorealism
textGolden hour landscape of coastal cliffs overlooking ocean, morning mist
rising from rocky shoreline, crisp foreground grasses with individual blades
visible, calm water reflecting warm light, soft atmospheric haze, 35mm lens
perspective with natural field of view, Kodak Portra film aesthetic with warm
skin tones and muted saturation, volumetric light scattering through mist,
cinematic depth with sharp foreground and soft background falloff, ultra-detailed
8K realism, travel photography --v 7 --ar 16:9 --s 160 --q 2
--no people, boats, text, artificial structures
Common Mistakes and How V7 Fixes Them
Mistake #1: Over-Complexity Leading to Interpretation Chaos
Many V6 users wrote extremely long prompts to “fight” the model into understanding. V7’s enhanced prompt comprehension eliminates this necessity.
Old V6 Approach (Inefficient):
textProfessional photorealistic portrait, beautiful woman, 35 years old,
elegant pose, professional lighting, studio setting, Nikon camera,
Canon lens, masterpiece, award-winning, perfect composition, perfect
lighting, high quality, 8K, ultra detailed, realistic skin texture...
Optimized V7 Approach (Effective):
textPortrait of 35-year-old woman, warm smile, professional studio light,
photographed on Canon EOS R5 85mm f/1.8, natural skin texture with visible
pores, ultra-detailed 8K --v 7 --ar 3:2 --s 150 --q 2
V7 understands the intent with half the words because its text interpretation is genuinely more sophisticated.
Mistake #2: Conflating “Realistic” with “Photorealistic”
Many prompts say “realistic” or “realism,” expecting photographic results. In AI training data, these terms appear in both photography and digital art contexts.
Better terminology:
- “Photorealistic” – Specifically signals actual photography
- “Photograph” or “photo” – Clarifies the target medium
- “Shot on [camera brand]” – Additional realism signal
- “Editorial photography” or “documentary photography” – Specific photographic genre
Mistake #3: Adding Contradictory Camera References
Mixing incompatible camera specifications creates confusion:
Contradictory Example:
textPortrait shot on wide 14mm ultra-wide lens, shallow depth of field f/1.2,
full-body pose, environmental context...
Problem: 14mm ultra-wide lenses cannot achieve shallow depth of field at f/1.2—you’d get the entire scene in focus. This contradiction confuses V7’s probability distributions.
Corrected Example:
textPortrait shot on 85mm f/1.8 lens, shallow depth of field, blurred background,
tight framing on face...
Mistake #4: Expecting Raw Mode to Always Improve Realism
Raw Mode disables artistic enhancement, but photorealism often benefits from V7’s professional aesthetic enhancement. Using Raw Mode indiscriminately actually reduces perceived realism.
Effective Raw Mode Use:
textProduct photography of ceramic mug, accurate color representation,
neutral studio lighting, true-to-life appearance --style raw
Ineffective Raw Mode Use:
textBeautiful portrait, soft lighting, professional photography --style raw
(Standard Mode here produces superior aesthetic results)
Optimization Workflow: From Concept to Final Image
Step 1: Define Your Creative Intent Precisely
Before writing any prompt, clarify: Are you creating aspirational editorial content (polish matters), documentary realism (truth matters), product photography (accuracy matters), or fine art portraiture (emotional impact matters)?
Each intent shapes parameter choices:
- Editorial:
--s 180-200with standard mode for enhanced polish - Documentary:
--s 100-150with--style rawfor truth - Product:
--s 120with--style rawfor accuracy - Fine Art:
--s 150-180standard mode for emotional impact
Step 2: Build Your Subject Foundation
Start with absolutely precise subject description. Not “woman,” but “35-year-old Mediterranean woman, olive skin, natural black hair, warm expression.” This foundation paragraph should take 1-2 sentences maximum.
Step 3: Add Scene/Environmental Context
One sentence describing the environment: “seated in modern minimalist office, natural light from large window, neutral backdrop.”
Step 4: Specify Lighting Strategically
One sentence of lighting language: “soft directional light with subtle rim lighting, warm color temperature, minimal harsh shadows.”
Step 5: Insert Camera Language
Specific camera brand + lens + aperture: “shot on Canon EOS R5 85mm f/1.8 lens.” This signals photorealism.
Step 6: Add Detail Layer
One sentence of texture specificity: “visible pores, subtle freckles, natural skin texture, realistic hair appearance.”
Step 7: Append Parameters
Place all parameters at end: --style raw --v 7 --ar 3:2 --s 150 --q 2 --no [unwanted elements]
Step 8: Test and Refine Using Draft Mode
Use Draft Mode (--draft) to generate quickly at 10x speed and half cost. This lets you test multiple parameter combinations rapidly. Once satisfied with compositional direction, enhance one selected image with full quality generation.
The Personalization System: Leveraging V7’s Learning Architecture
Every V7 user completes a personalization setup: rating approximately 200 image pairs according to preference. This system builds a unique aesthetic profile that influences all subsequent generations.
Maximizing Personalization Impact:
- Complete the full 200-image rating – Don’t skip pairs; partial profiles significantly reduce personalization effectiveness
- Rate consistently – Your preferences should be coherent, not random, to build a meaningful aesthetic signature
- Understand what you’re rating – The system learns your preferences for composition, color temperature, stylization level, and subject preferences
- Combine with style references – Personalization profiles work synergistically with SREF codes (style reference codes); a profile trains long-term preferences, SREF trains single-generation aesthetic
Technical result: Users with complete personalization profiles see 47% improvement in style consistency across multiple generations, dramatically reducing quality variation iteration-to-iteration.
Advanced Techniques: Image References and Style References
Using Omni Reference (–oref) for V7
V7 introduced Omni Reference, replacing older Character Reference systems. OREF lets you upload reference images to guide generation.
Effective Omni Reference Use:
text[Text prompt] --oref https://[your-image-url] --oref 50
The numeric value (0-100) controls how strongly the reference influences generation. Lower values prioritize text prompt; higher values favor the reference image.
Pro Strategy: Use OREF for consistent character generation across multiple scenes, or to match specific product appearance across variations.
Style References (–sref) and –sw Parameter
Style references guide the aesthetic (not the content) of generation. An SREF code can encode a specific photographer’s color palette, lighting approach, or compositional style.
text[Text prompt] --sref 12345 --sw 100
The --sw (style weight) parameter ranges 0-1000, controlling how strongly the style influences output. Optimal range for photorealism: --sw 100-200. Higher values (500+) risk overriding prompt content with style.
2025 Performance Metrics and Realistic Expectations
What V7 Achieves vs. Human Photography
Recent comparative testing (December 2025) shows V7’s photorealism capabilities in context:
Areas Where V7 Matches Professional Photography:
- Skin texture rendering: 8.7 FID score (nearly professional level)
- Hand anatomy: 85-90% accuracy in standard poses
- Lighting and shadow realism: 63% improvement in naturalness indicators
- Cloth and fabric texture: Highly realistic for most materials
- Environmental lighting coherence: Exceptional, especially golden hour
Areas Where V7 Still Shows Visible AI-Generation:
- Complex multi-hand interactions remain challenging
- Extreme close-ups of eyes sometimes show subtle unrealism
- Intricate architectural details occasionally distort
- Text generation remains notably unreliable
- Extreme action poses sometimes show anatomical strain
User Success Rates (from December 2025 community data):
- Standard portrait poses: 85-90% “acceptable on first attempt”
- Product photography: 80-85% directly usable without refinement
- Landscape/environmental: 75-80% generally satisfactory
- Complex multi-figure composition: 40-50% usable without editing
These statistics represent dramatic improvements over V6 (which achieved approximately 60-70% success rates in comparable categories) and absolutely transformative compared to V5 (30-40% success rates).
The Professional Workflow: Iteration and Refinement
Using Vary and Enhance in Draft Mode
V7’s Draft Mode permits rapid iteration. After generating initial composition in Draft Mode:
- Vary Subtle – Minor changes maintaining composition and pose, perfect for tweaking lighting or expression
- Enhance – Selectively upgrade resolution on Draft Mode images
- Retexture – Change style while maintaining composition (available in editor)
Professional Workflow Example:
Generate 4 Draft images → Select best compositional match → Vary Subtle 2-3 times → Select winning variation → Enhance to full quality → Use editor for final refinements if needed.
This approach reduces iteration time by 70% compared to standard mode reprocessing.
Prompting for Specific Professional Scenarios
Corporate Headshots: Executive Confidence
textProfessional headshot of 55-year-old CEO, salt-and-pepper hair,
confident expression, business formal attire in navy blazer,
photographed in corporate office environment, warm natural window
light with subtle rim lighting separation, shot on Canon EOS R5 85mm
f/1.8 lens at f/2.0, professional color grading, realistic skin tone
with visible age-appropriate texture, sharp eyes with natural catchlights,
soft bokeh background showing office ambiance, editorial photography
quality, LinkedIn professional standard --v 7 --ar 3:2 --s 140 --q 2
E-Commerce Product: Beauty Brand
textLuxury skincare facial oil in glass amber bottle, minimalist product photography,
positioned on natural stone surface, soft directional studio light creating
product luminosity without glare, clean composition emphasizing bottle form and
transparency, photographed with 85mm macro lens at f/2.8, studio photography
aesthetic, ultra-detailed 8K product photography, professional e-commerce
quality --style raw --v 7 --ar 4:5 --s 120 --q 2 --no distracting elements,
text, branding, blur
Editorial Fashion: Haute Couture
textFull-length editorial fashion portrait of 24-year-old model wearing
couture evening gown in burgundy silk, dramatic architectural design,
powerful posture with hands gesture conveying elegance and confidence,
photographed in minimalist studio with subtle lighting emphasizing fabric
structure, shot on Hasselblad H6D medium format camera with 80mm lens,
Kodak Portra film aesthetic, high-fashion editorial photography,
magazine cover quality lighting, ultra-detailed 8K --v 7 --ar 2:3 --s 190 --q 2
Real Estate: Luxury Home Interior
textLuxury kitchen interior with marble countertops, stainless steel appliances,
natural window light streaming across surfaces creating warm ambiance,
photographed from slightly elevated angle showing space depth and flow,
architectural interior photography aesthetic, shot with 35mm lens at f/5.6
for depth throughout, professional real estate photography standard, warm
neutral color palette, ultra-detailed 8K architectural photography --v 7
--ar 16:9 --s 160 --q 2 --no people, clutter, personal items
Future-Proofing Your V7 Prompts: Compatibility and Longevity
As Midjourney continues evolving toward V8 and beyond, certain prompt structures remain robust:
Future-Proof Prompt Elements:
- Camera specifications (always effective across model versions)
- Lighting language (fundamental to all image synthesis)
- Specific material descriptions (transferable across architectures)
- Aspect ratio and composition language (universally understood)
- Negative prompts (robust across versions)
Less Stable Prompt Elements:
- Specific stylization value ranges (may shift optimal ranges)
- Raw Mode behavior (may change with model updates)
- Parameter syntax (occasionally modified between versions)
Best Practice: Document your effective prompts with the specific V7 parameters used. When new versions arrive, your foundational prompt structures will adapt quickly, requiring only parameter adjustment rather than complete rewriting.
Mastering the Feedback Loop: Iteration as Art
The most advanced V7 users understand that prompt writing is iterative. Your first prompt approximates intent; subsequent variations refine understanding.
Pro Iteration Strategy:
- First generation: Test your core concept with straightforward language
- Analyze output: What succeeded? What diverged from intent?
- Identify problem areas: Specific elements that didn’t render as intended
- Revise with precision: Add specific language addressing problem areas
- A/B parameter test: Change only one parameter (–s, –q, –style) to isolate effects
- Build prompt library: Document successful prompts for future reference
Users who iterate methodically—testing single-variable changes rather than wholesale prompt rewrites—achieve photorealistic results in 2-3 generations rather than 8-10.
Troubleshooting Common Photorealism Issues
Issue: Skin Looks Overly Smooth or Plastic
Cause: Default aesthetic enhancement too strong
Solution:
textAdd texture language: "visible pores, subtle skin texture, age-appropriate
fine lines, natural skin finish without excessive smoothing"
Use lower stylization: --s 100-130
Consider Raw Mode: --style raw
Issue: Hands Appear Distorted or Unnatural
Cause: Complex pose or inadequate specific guidance
Solution:
textSimplify hand position in prompt: "relaxed hands" or "hands gently clasped"
Be extremely specific: "five fingers naturally curved around ceramic mug,
proper joint articulation, realistic fingernails"
Use Draft Mode to iterate: Test pose quickly before full quality generation
Issue: Background Distracting or Blurry
Cause: Shallow depth of field creating excessive bokeh, or environment under-specified
Solution:
textSpecify background: "soft studio backdrop, neutral gray, evenly lit"
Adjust depth description: "moderate depth of field, f/4 instead of f/1.8"
Use negative prompt: --no blurry background, excessive bokeh
Issue: Colors Look Unnatural or Oversaturated
Cause: Default Midjourney aesthetic too vibrant, or color temperature unspecified
Solution:
textSpecify color palette: "Kodak Portra film aesthetic, warm muted tones"
Add color temperature: "neutral color balance, 5000K light temperature"
Use Raw Mode: --style raw reduces saturation significantly
Lower stylization: --s 100-140 for more realistic color
Conclusion: Elevating Your Creative Practice with V7
Midjourney V7 represents a watershed moment in professional AI image generation. The technical achievements—82% improvement in hand anatomy, 8.7 FID skin texture scores, physics-based ray tracing—translate into practical reality: you can now generate genuinely photorealistic images that rival professional photography, provided you prompt with appropriate specificity and technical understanding.
The fundamental principle underlying successful V7 photorealism is straightforward: prompt like a professional photographer briefs another photographer. Specify subject with precision. Describe lighting in technical language. Reference professional equipment. Include texture details. Control parameters strategically.
The users achieving the most remarkable results aren’t those writing longer prompts—they’re those writing more specific, technically informed prompts. Every element serves purpose. Every parameter choice reflects intentional creative decision.
Your competitive advantage lies not in learning tricks, but in understanding the technical foundations: why camera references enhance realism, how lighting language shapes output, which parameters control quality at what trade-offs. This knowledge transfers across future model versions, future tools, future technologies.
The 900+ word articles promising “10 weird tricks” miss the actual insight: V7 responds to professional photographic knowledge. Master photographic language, understand technical parameters, iterate methodically, and V7 becomes not a tool generating “AI-looking” images, but a tool generating genuinely photorealistic visual content indistinguishable from professional photography.
Your next photorealistic generation awaits—approach it with the precision it deserves.
Read More:Unlock Genius-Level Problem Solving: The “Tree of Thoughts” Method for Complex Math with AI
Source: K2Think.in — India’s AI Reasoning Insight Platform.